Frame Assembly
Proper execution of blind joints and correct installation of extrusions are crucial for the stability and performance of your 3D printer. A solid, accurately measured, and well-assembled platform on which the printer is mounted will directly impact the quality of prints and overall performance. In this guide, we will outline the steps you need to follow to ensure that the printer's platform is parallel and properly assembled, maximizing the stability and accuracy of your printer setup.
Blind Joint
Blind joints are a commonly used assembly technique in 3D printer frames. Their main advantages are that they are not visible from the outside and provide a strong connection. However, they are prone to incorrect installation and can easily loosen under vibration. Therefore, it is essential to use Loctite to secure the connection. Below, we will walk you through the step-by-step process of how to create and assemble a blind joint properly:
Drilling
You need to drill the extrusions at the required locations using a 5mm drill bit for the blind joint. Make sure the hole is centered to ensure a proper fit for the allen key.
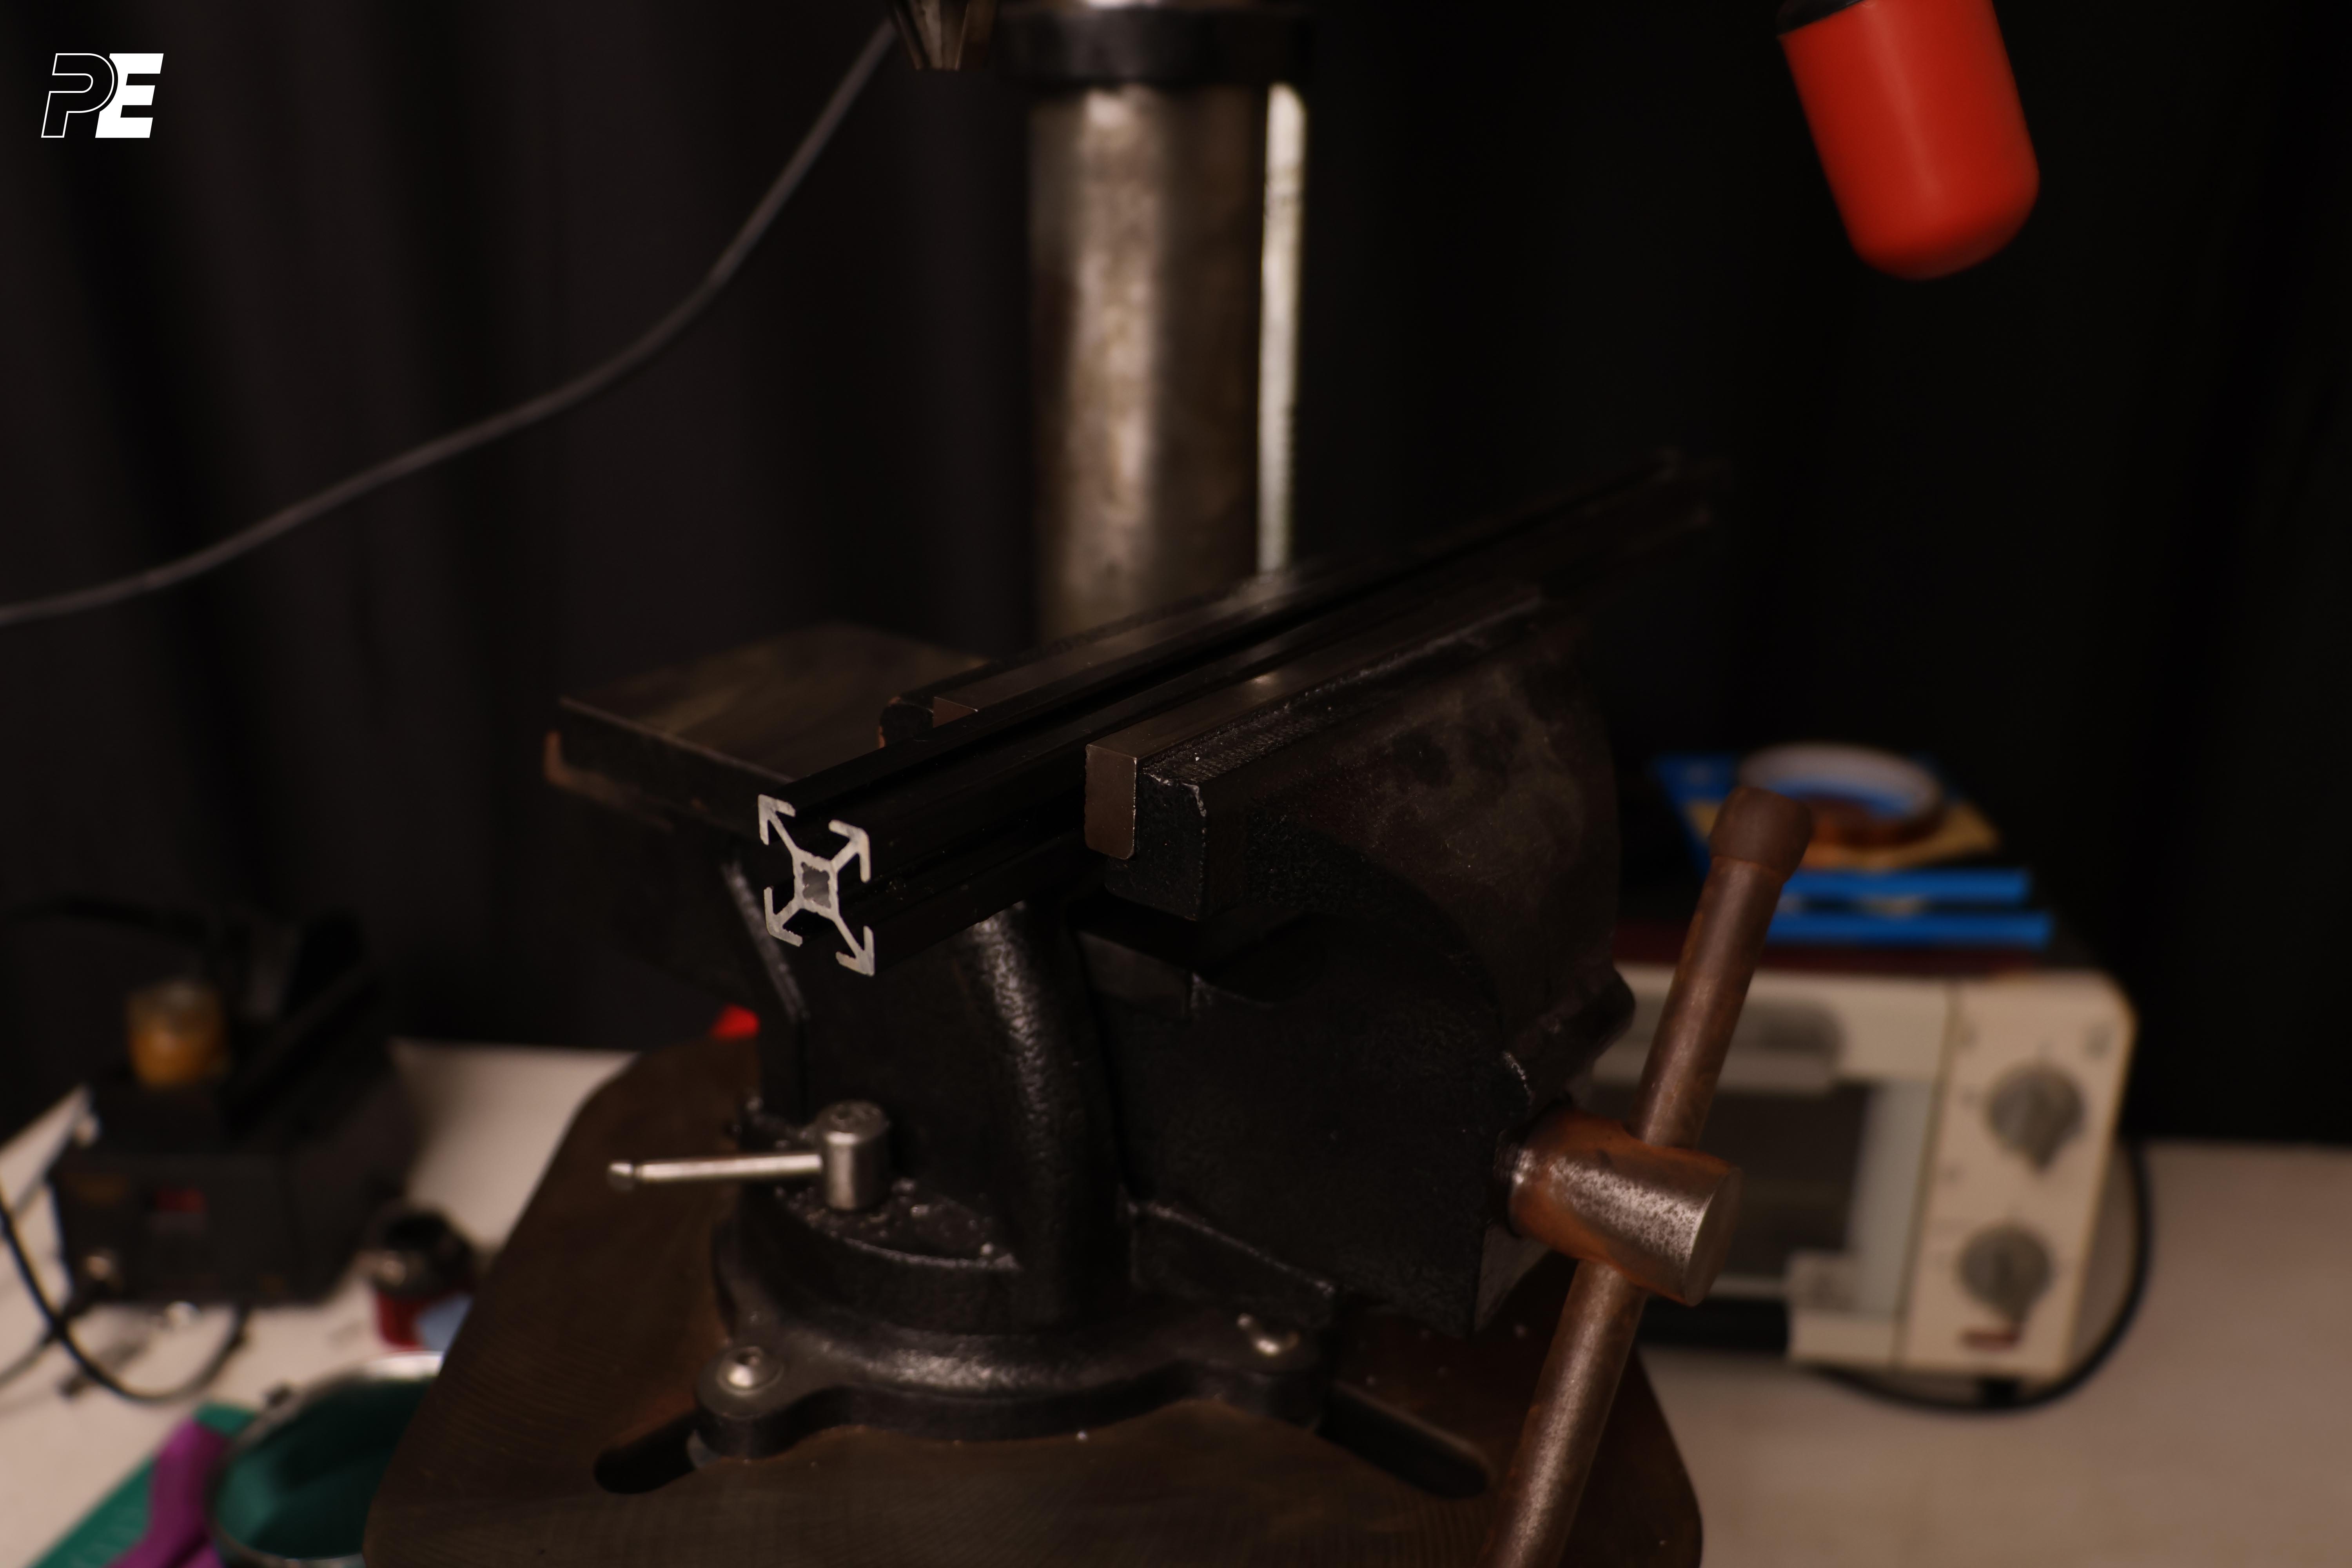
a) Secure the extrusion
Before starting the drilling process, it's essential to securely clamp the extrusion in place using a tool like a vise. If the extrusion is not held tightly, it may shift during drilling, leading to misalignment or incorrect hole measurements. Ensuring the extrusion is stable will help you drill accurately and avoid mistakes.
b) Mark the drill location
If you don’t have a jig to mark the drilling positions, use calipers to measure the desired position on the extrusion and mark it by scribing a line. This will serve as a guide for accurate drilling, ensuring that the holes are positioned correctly.
- danger
To avoid damaging the caliper, lightly trace the anodized coating only on the extrusion.
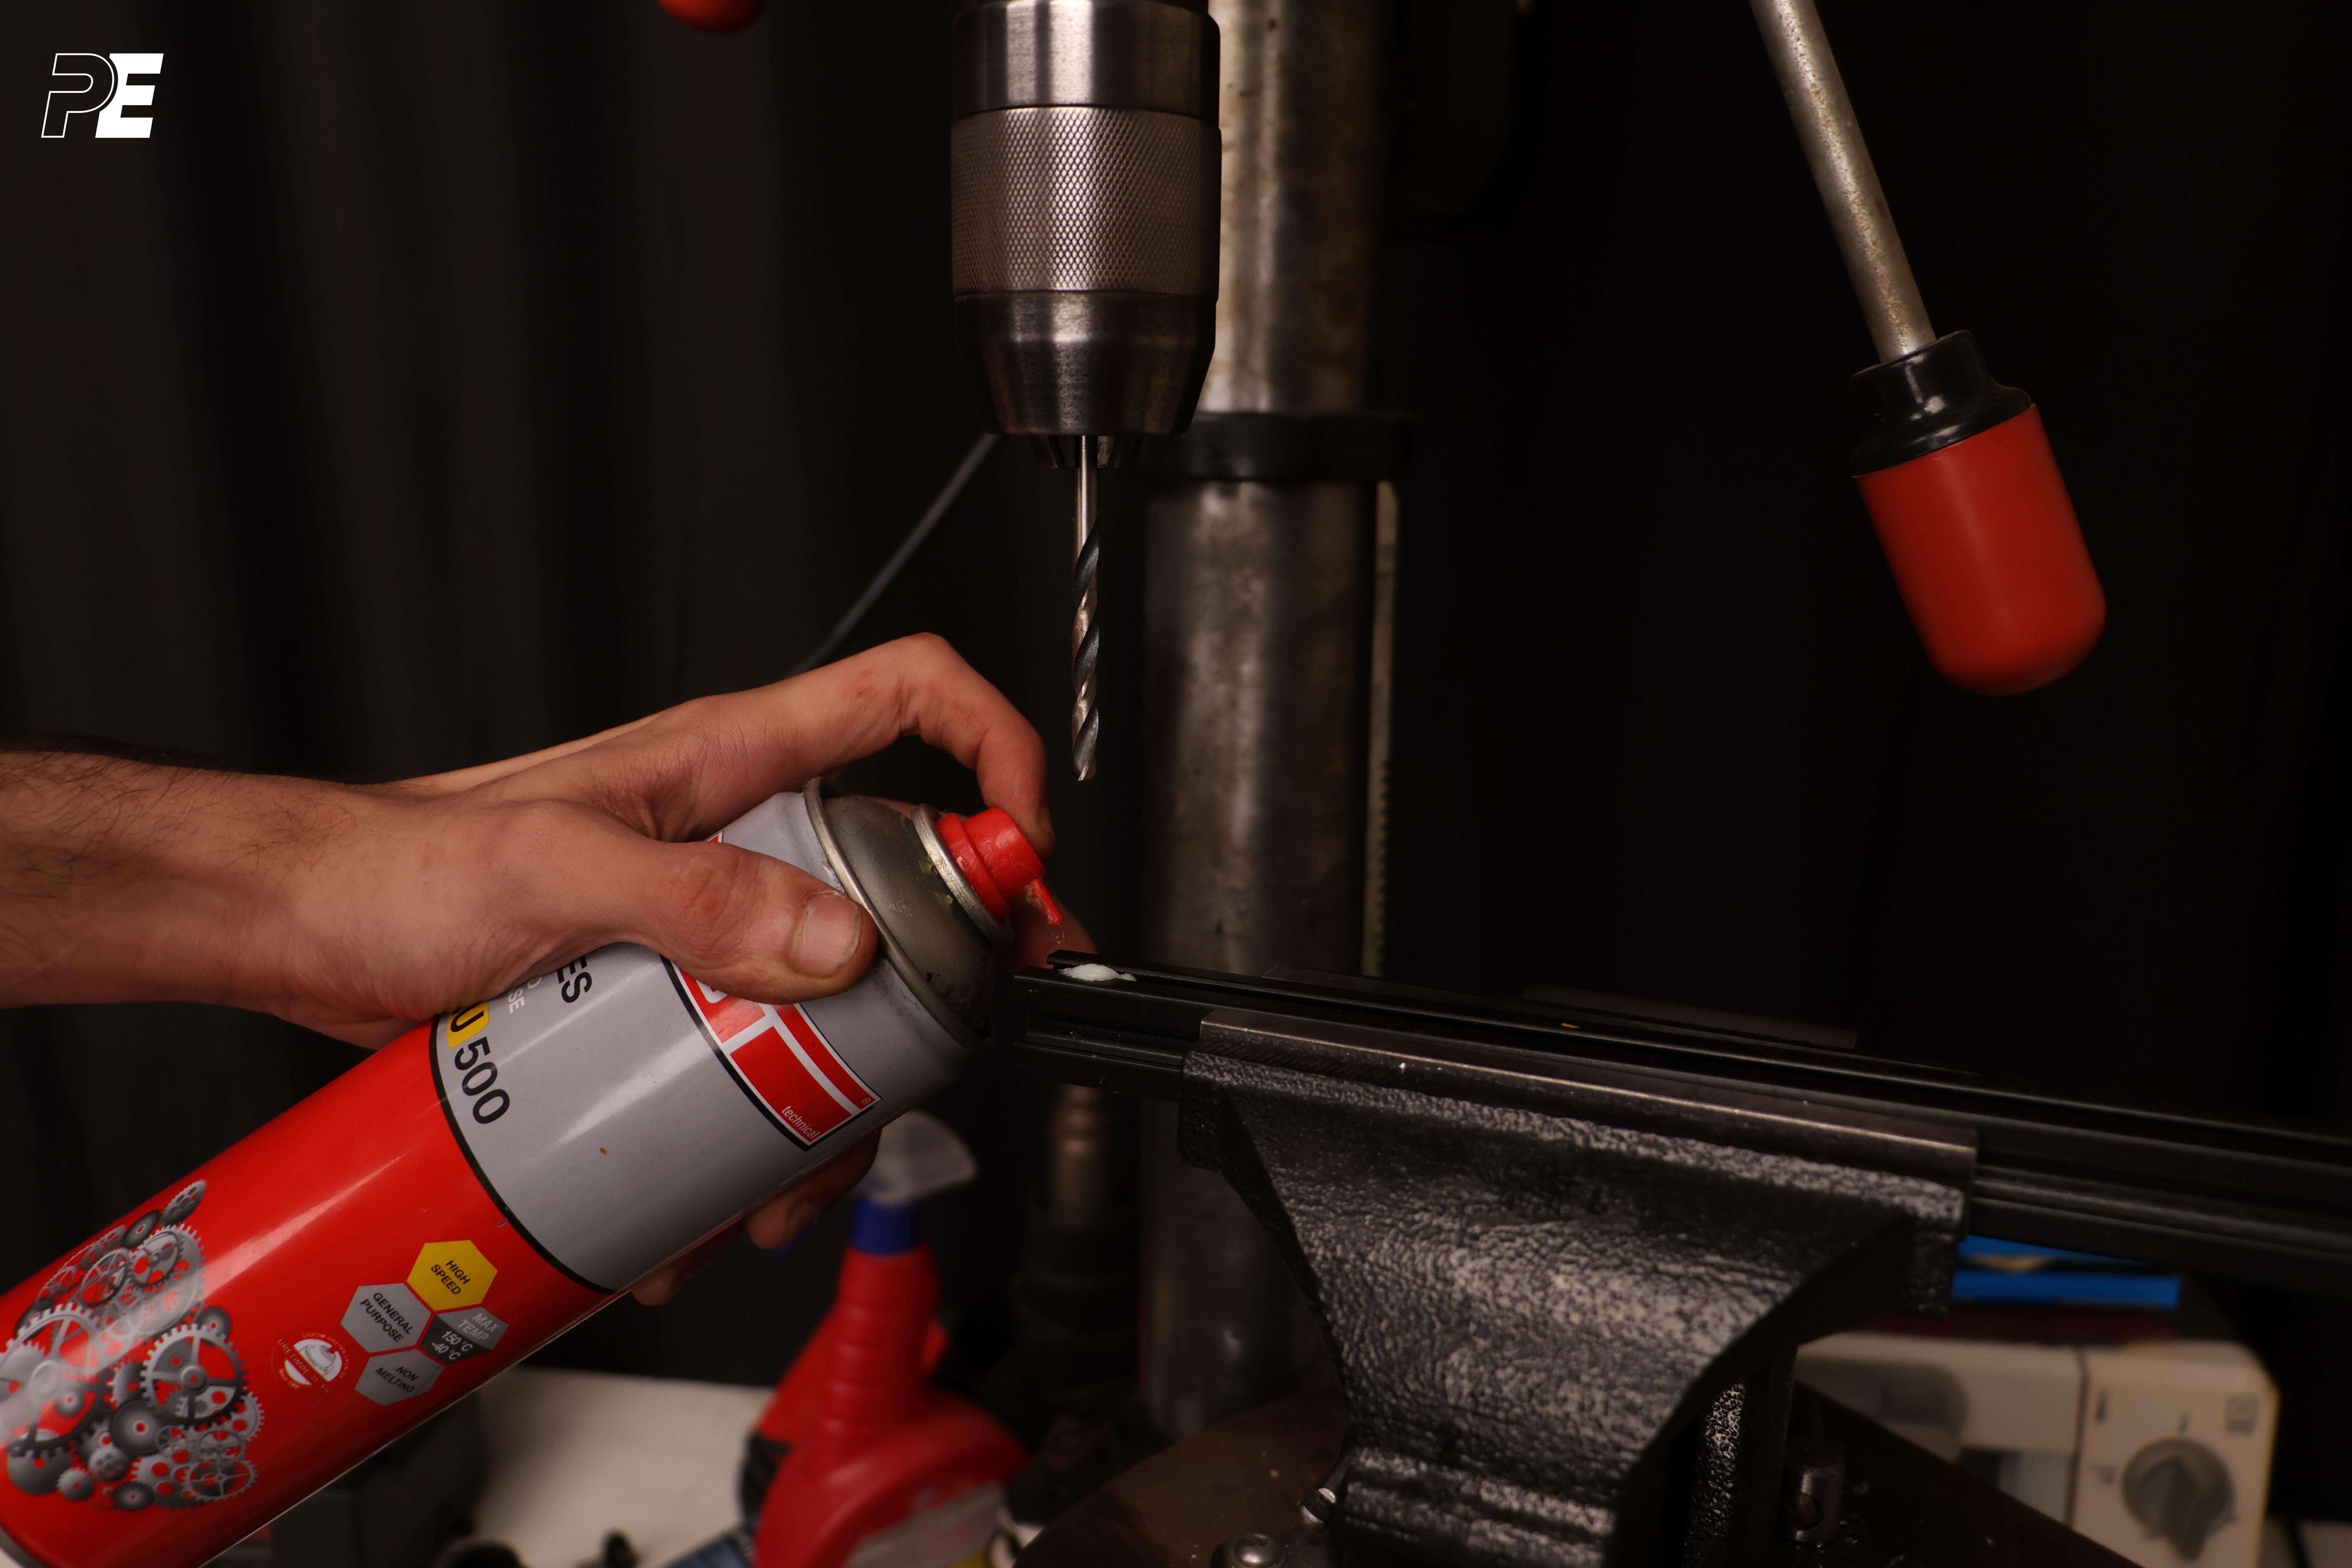
c) Coolant
While drilling the holes, it's important to use cooling fluid for a smoother and cleaner process. You can use lubricants like cutting oil, liquid grease, or even boron oil as cooling fluids. These help to reduce friction, prevent overheating, and ensure a more precise drilling operation.
Apply the cooling fluid to the area to be drilled before starting the drilling process. Additionally, continue applying the cooling fluid during the drilling to keep the area lubricated and prevent overheating.
d) Drilling the acces hole
Since the extrusions we are using are made of aluminum, their heat resistance is not very high. To prevent the material from overheating, it's important to drill at low RPMs (around 1000-1500). As mentioned in the previous step, don't forget to use cooling fluid during the drilling process to further minimize heat buildup and ensure a clean and precise hole.
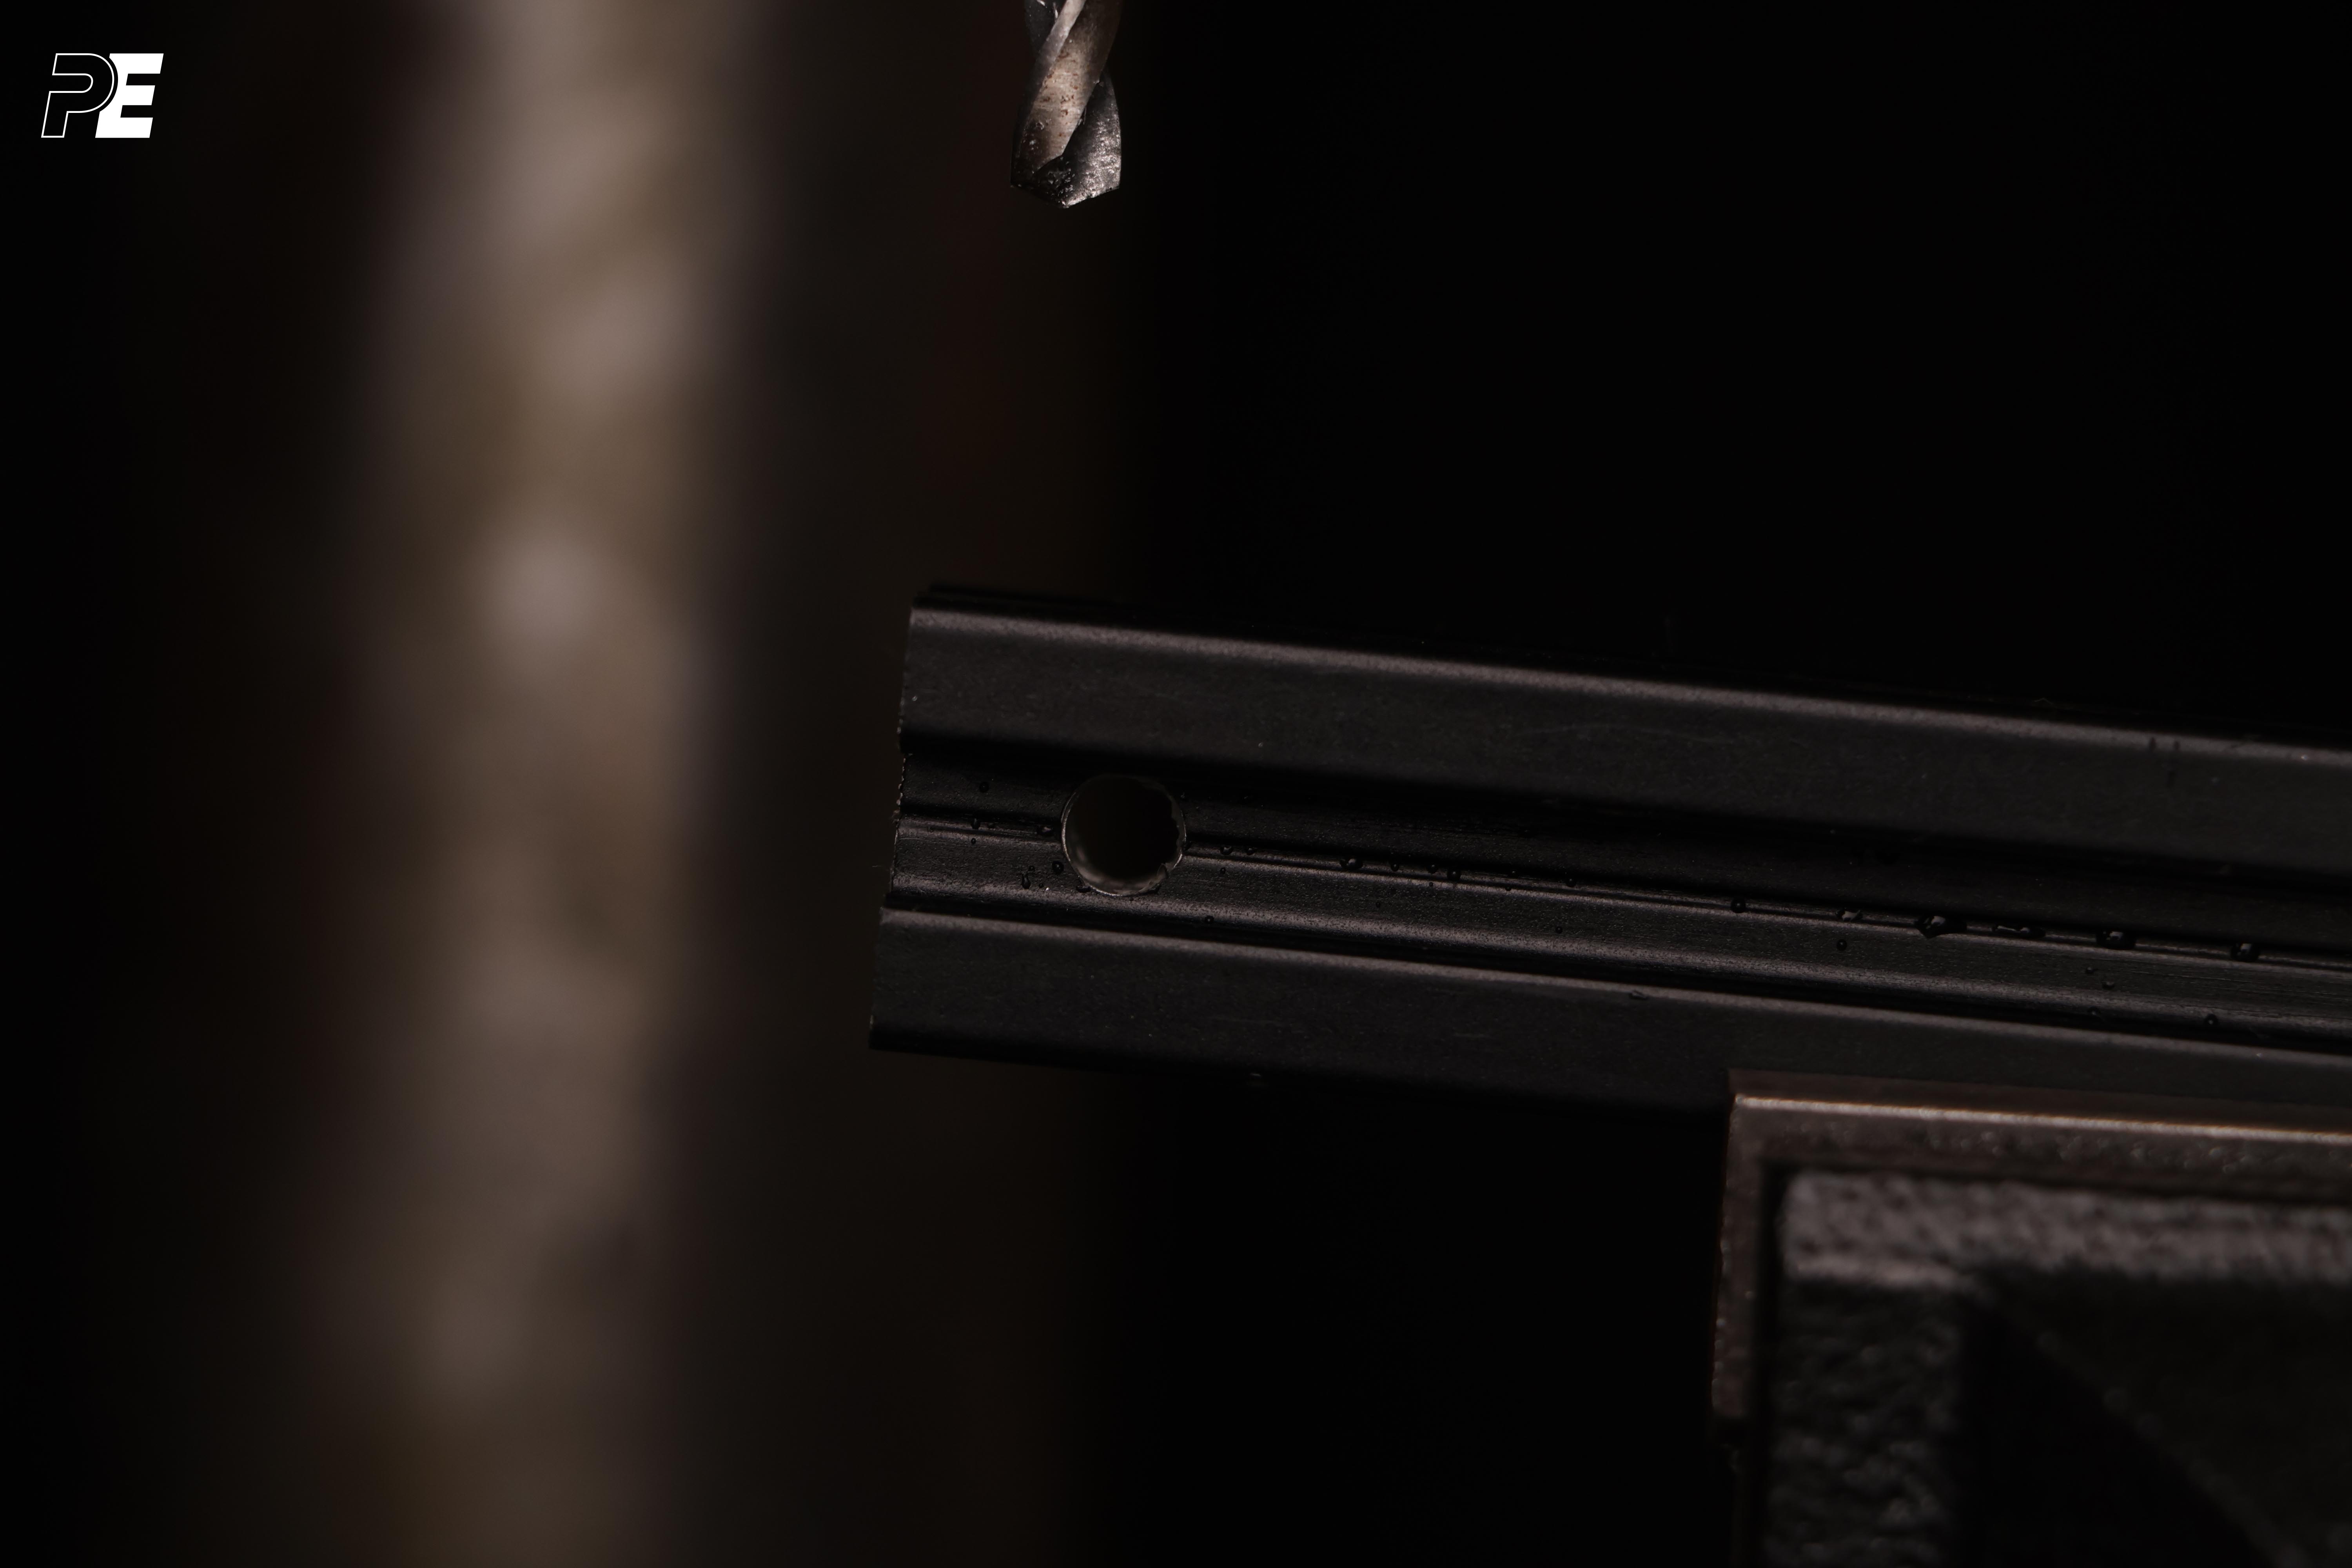
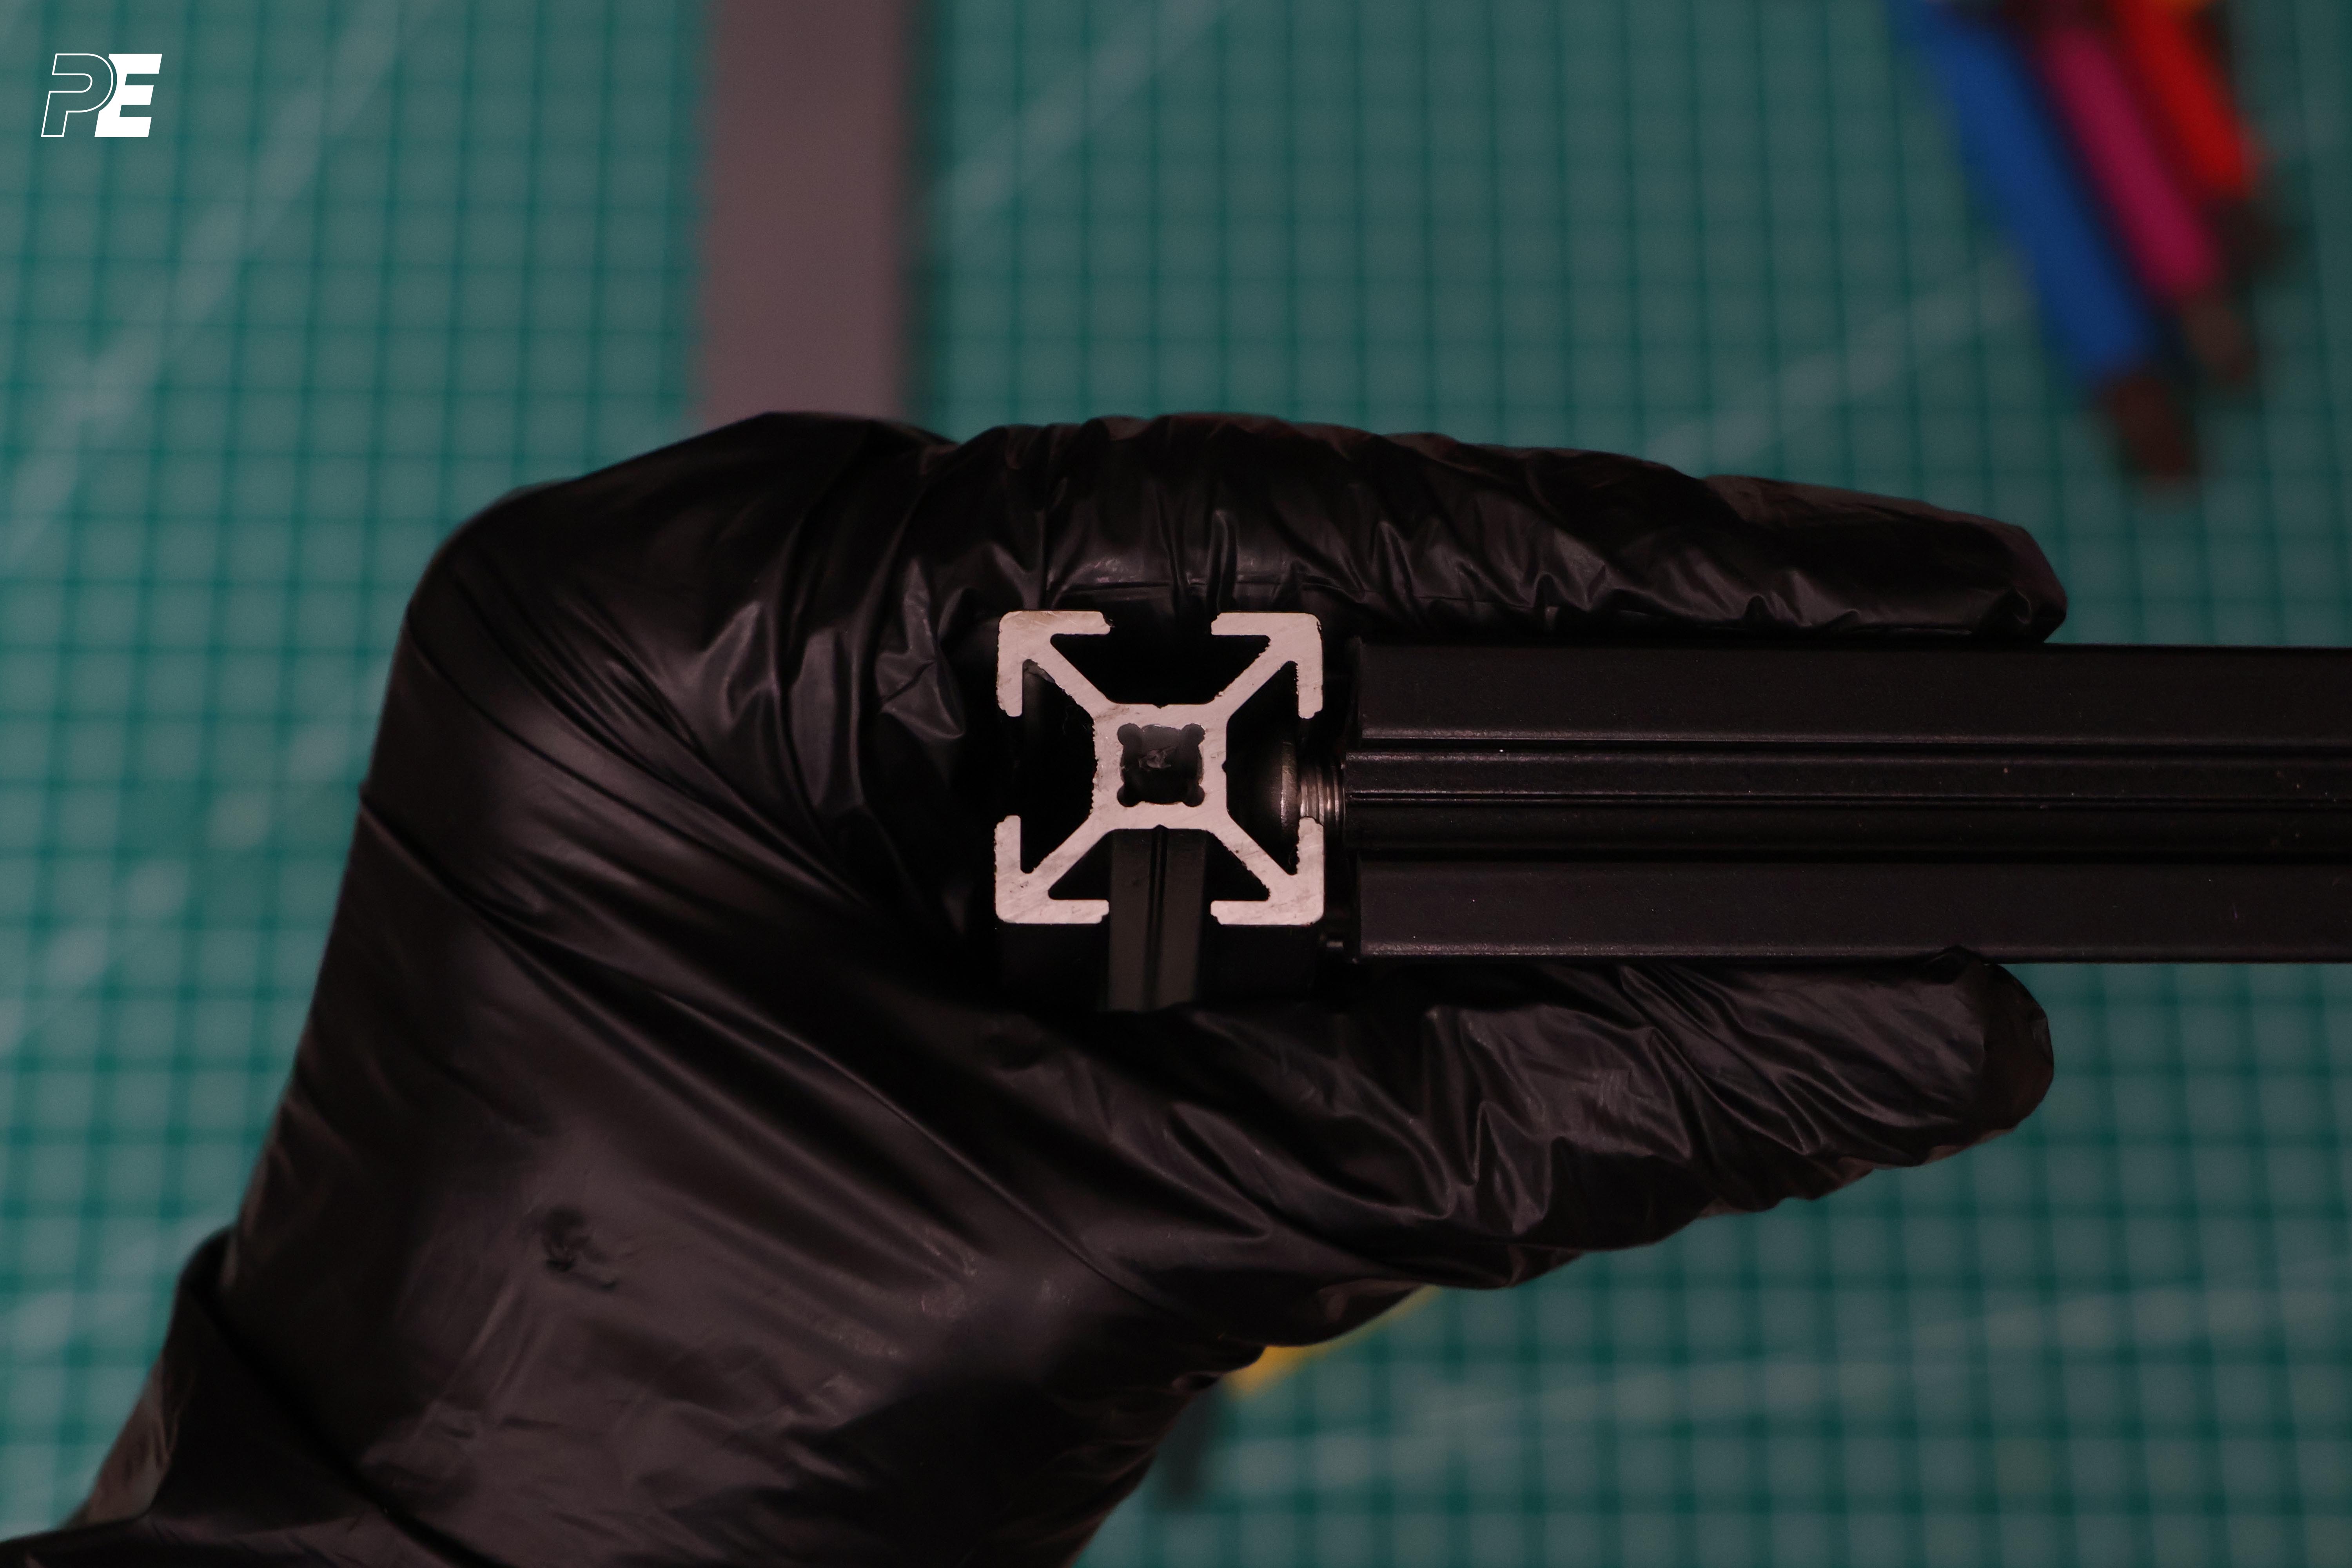
You are Done!
If you have followed the steps above correctly, you should have drilled a clean hole similar to the one shown below.
Tapping
Tapping threads on the extrusions is one of the most critical and delicate aspects of the blind joint assembly. If you cannot cut the threads cleanly and accurately, you won't be able to torque the blind joint bolts sufficiently, which can lead to the frame loosening over time. This, in turn, can cause numerous issues.
a) Secure the extrusion
Before starting the tapping process, securely clamp the extrusion in place.
b) Lubricant
Using lubricant can be very beneficial when threading, as it facilitates the cutting of the threads. Dont forget to lube the tap itself.
c) Cutting the Threads
Using lubricant can be very beneficial when threading, as it facilitates the cutting of the threads.
- tip
When cutting the threads, don't forget to periodically reverse the tap. This helps prevent chip buildup and ensures smoother threading.
d) Chamfering
You can chamfer the entry point of the threads. This will remove all the chips that is remained on the extrusion and make the surface smoother.
You are all set!
If you've followed the steps correctly, your tapped extrusion should like this;

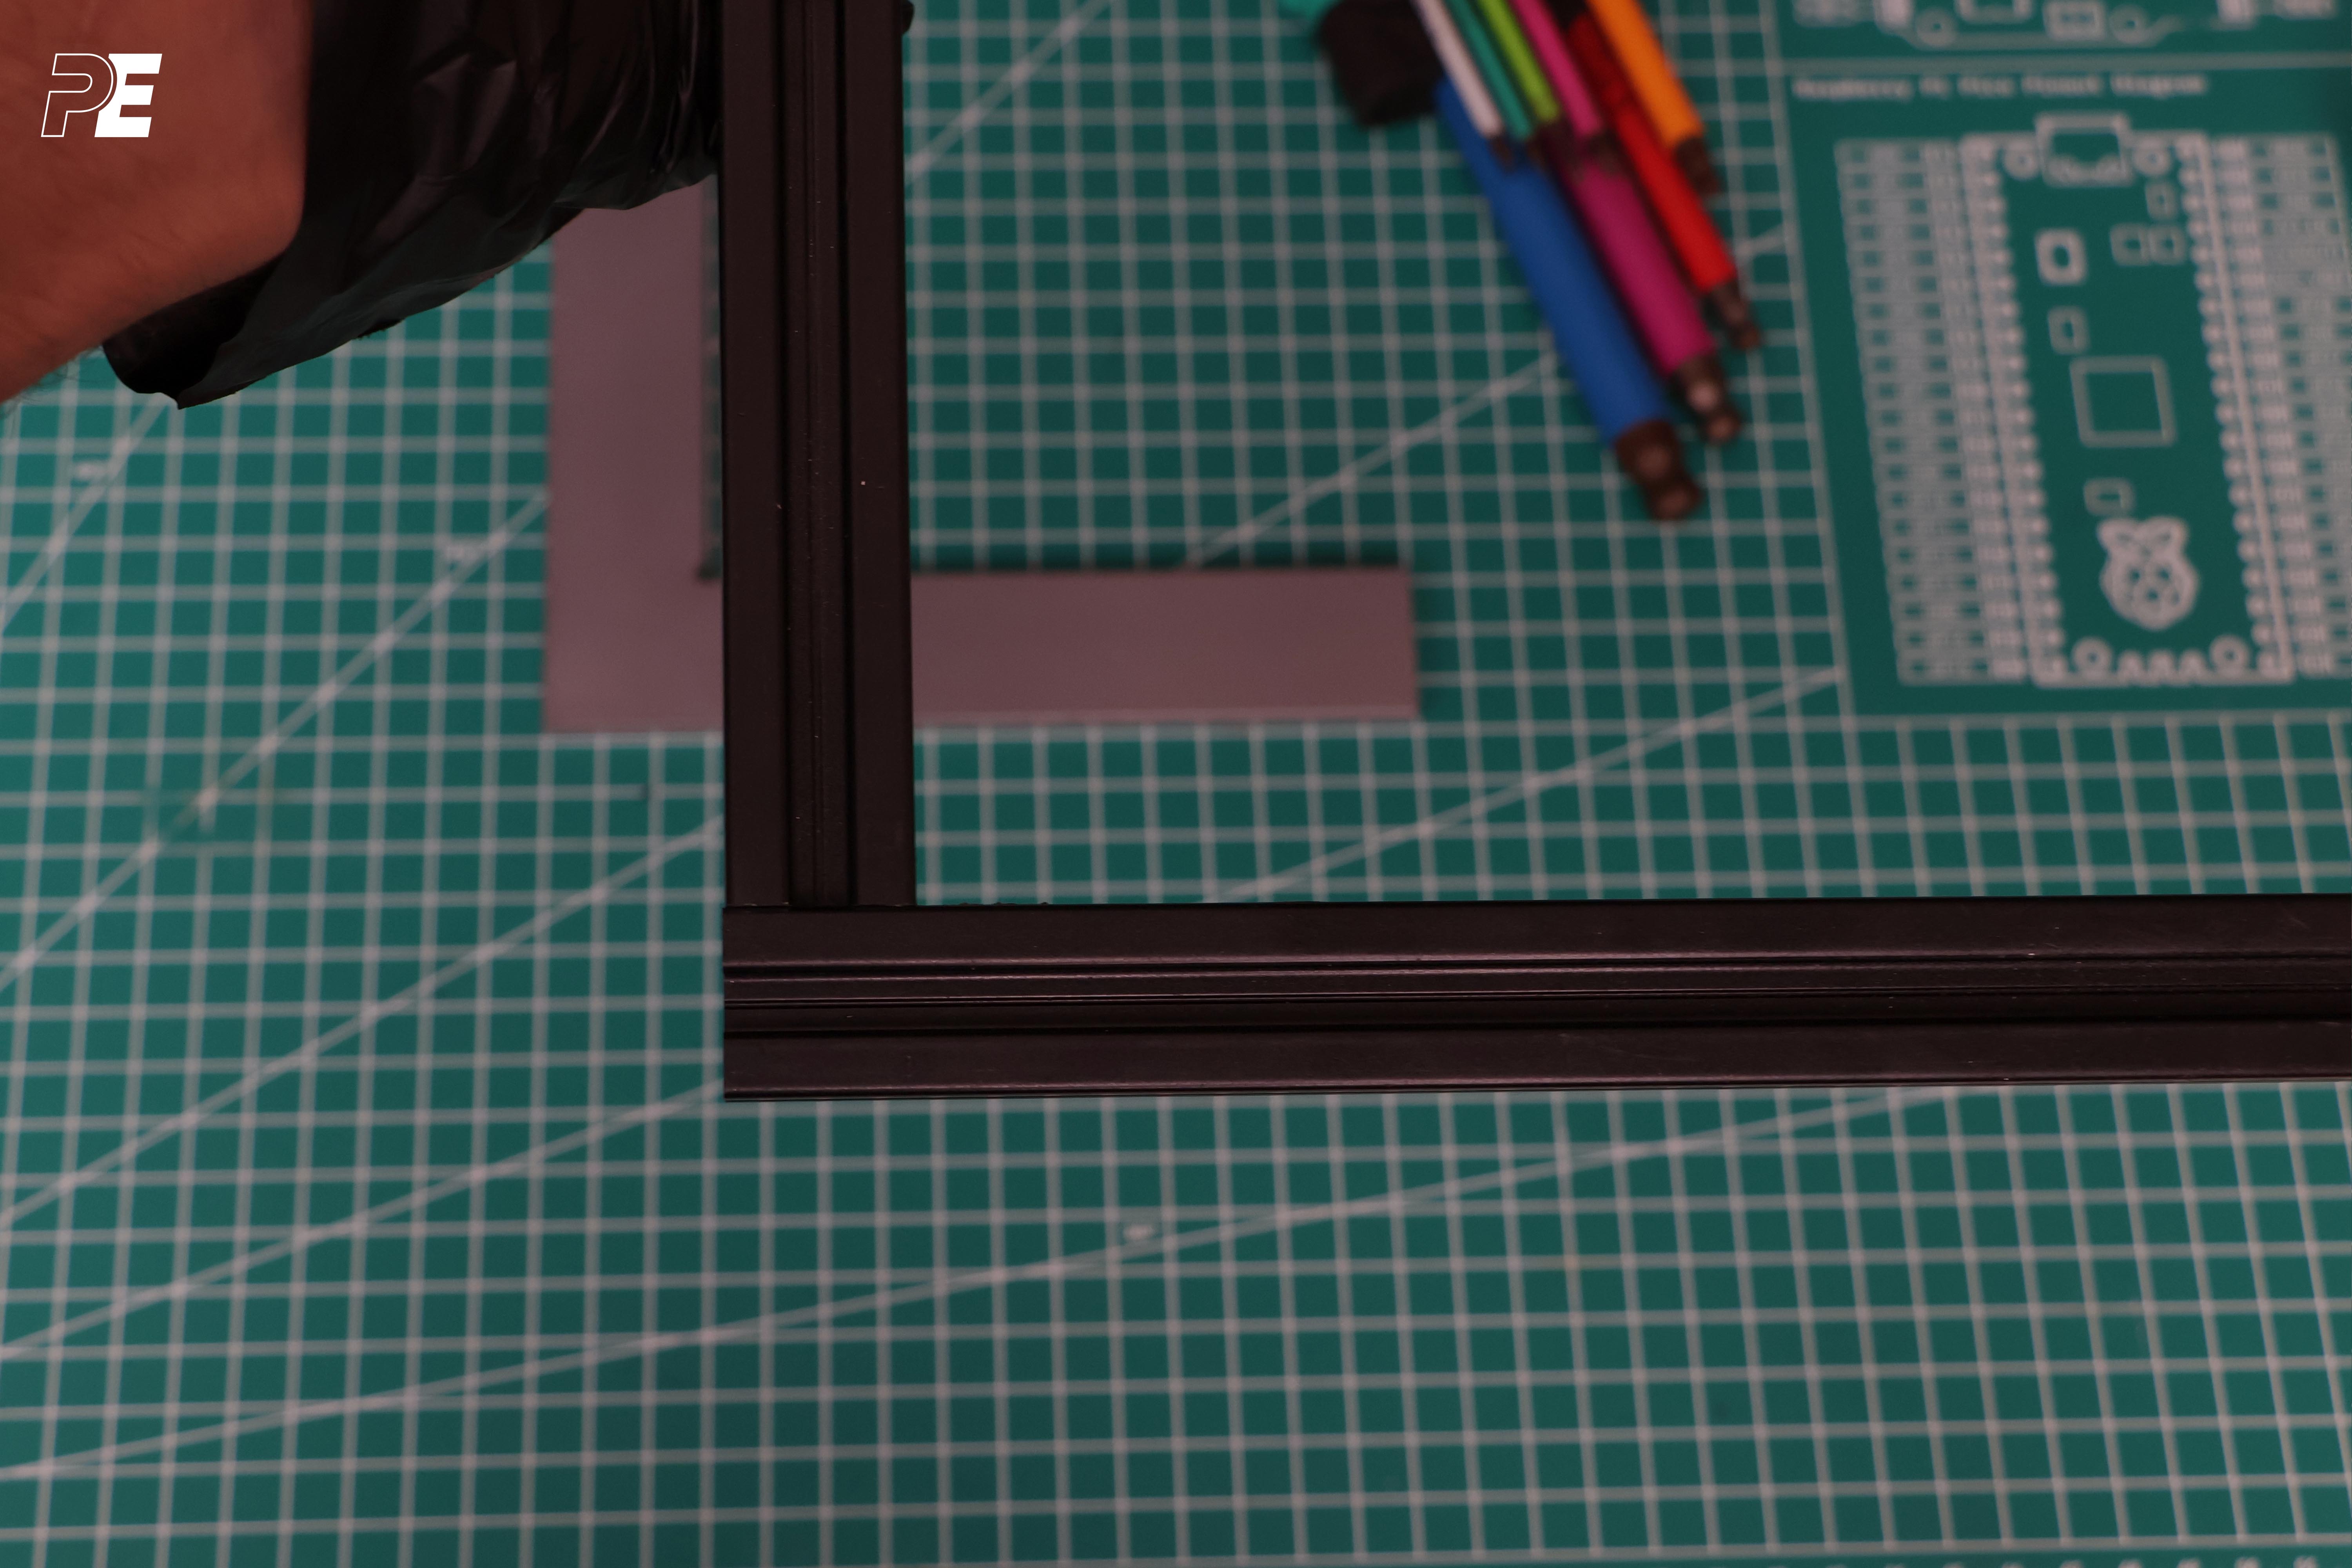
Assembly
Proper assembly of the 3D printer frame is crucial for achieving optimal performance and print quality. A well-aligned frame ensures stability and reduces issues like misalignments or vibrations during printing. To guarantee the frame is perfectly square and secure, we recommend using Loctite to lock the screws in place and a square to ensure precise angles during assembly. Taking the time to carefully assemble the frame will result in a more reliable and accurate 3D printer in the long run.
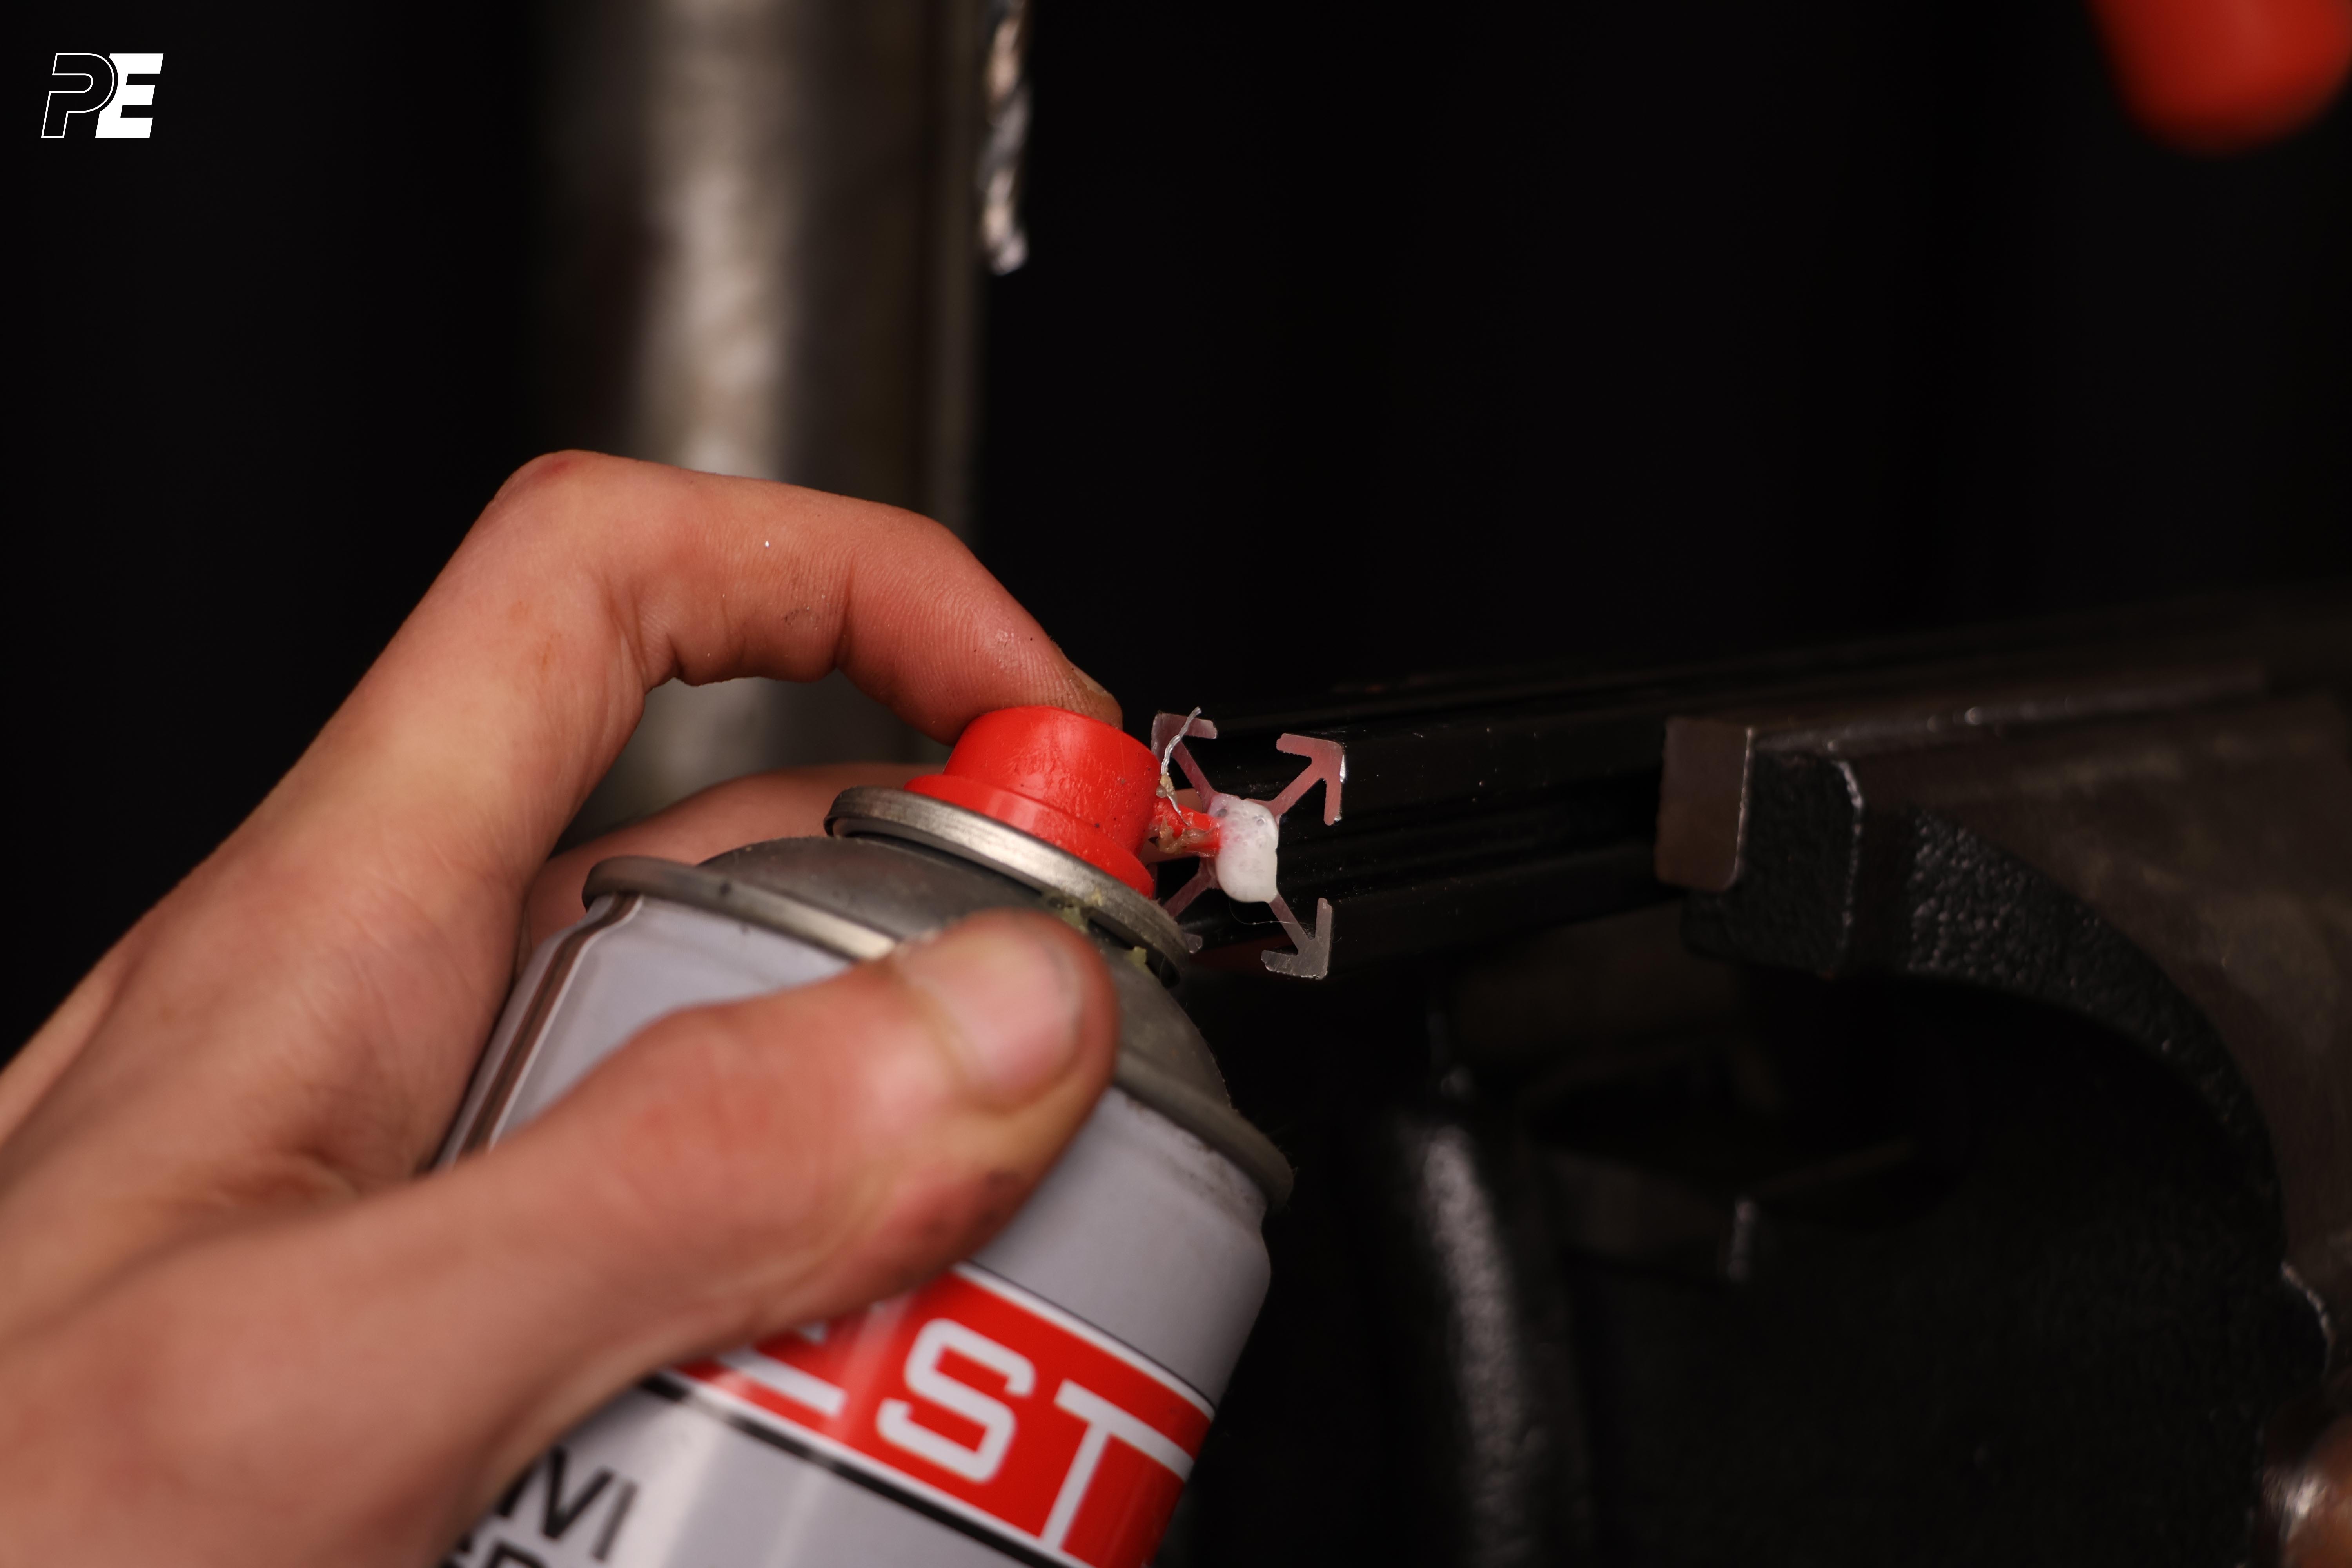
a) Applying Loctite
Apply a small amount of Loctite to the threads of the screws to ensure they stay securely in place. You can also apply a bit of Loctite to the threads you cut into the extrusions for added stability. This helps prevent any loosening over time and ensures the frame remains solid and well-aligned.
- caution
Use Loctite with a low or medium strength to secure the screws, as higher strength Loctite can make it difficult to disassemble later if needed. This will provide enough hold to keep the frame stable, while still allowing for adjustments or future maintenance without excessive effort.

b) Insert the Bolt and Slide the Extrusion
Place the screw into the threaded section you created, but don't tighten it all the way. Leave a gap of about 5-6mm, just enough for the other extrusion to slide in smoothly
c) Tighten the Bolt
Tighten the screw using an Allen key, and be sure to use a square during this process to ensure the frame is properly aligned.
- caution
Avoid over-tightening the screws, as this can damage the threads in the extrusion, causing them to strip. Tighten them just enough to hold the frame securely without risking damage to the components.

You are Done!
By following all of the steps mentioned above, you will achieve a solid and well-aligned joint.